Wednesday, June 29, 2011

Little lime hydrangea update

Remember the Little Lime hydrangeas we planted along the front porch? Well, I couldn't be happier with them so far. I've tried to grow hydrangeas in the front garden a couple different times with no luck, so I am thrilled these are working out so well.

Usually when I plant something new I have to baby it for the first season with regular watering. These guys have been very low maintenance, they never wilt and do ok even if I'm a day or two late to water them. From my experience, that's pretty good behavior for a hydrangea.

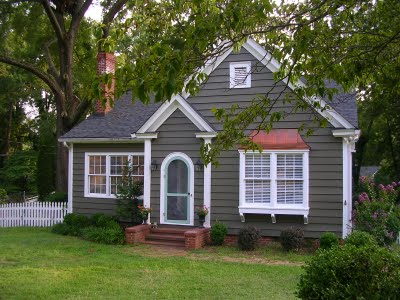
You can see two of the three in this picture...they are still small but doing well.


The picture below was taken May 16th right after they were planted. It's cool to see how everything has changed since then.


And now they are getting ready to bloom like crazy. This makes me so happy!


One of the plants gets a bit of shade from the River Birch and it's doing just as well. It was smaller than the other two to start with.


By next year they should reach the floor of the porch...you can see just a peek of them through the purple cone flowers above.

I was so inspired by the Little Limes that I planted three Limelight hydrangeas along the newly built back deck. They are the grown up version of the Little Limes. We didn't have anything planted here before and the last couple years we knew the old deck was about done so we waited.


These will get quite large and blend together to form a hedge since I planted them close together. They are pretty leggy now but should look better after I cut them back in the spring.

My vision is for them to be huge and overflowing with blooms like this picture...


and this one...


and one more just for fun.

The last three pictures are from Deborah Silver

If they do as well as I hope, in a couple years we will be enjoying massive flowers from the yard and from the deck. Any Limelight lovers out there?


Joining Censational Girl's garden link party here.

Wednesday, June 22, 2011

miniatures for the Herb Garden

After planting the fairy garden I couldn't resist adding a few tiny accents to my herb garden. I let the little one know this is my special garden and to please leave the little goodies where they are. :) So far she has been very respectful since she has her own miniatures to play with. I'm really liking five years old...she is getting to be such a big girl but still little at the same time.


I went crazy for these little rubber boots and tiny pots when I first laid eyes on them.


This year I planted cilantro, rosemary and thyme. The chives are sitting in a pot waiting to be planted in place of the Alyssum flowers...I like to use them as a filler. I took this picture May 23rd right after it was planted.


Herbs grow so fast...here it is today sitting on a shiny new deck. Mr. 65th wanted me to do a post titled one man, one deck and a fifteen dollar drill. He is such a dork!


The huge pot is from Target. I'm loving copper these days. I really want to have the roof of the portico done in copper but it's so expensive, even for a tiny roof.

FYI...our Target still had a few of these pots and they are on clearance incase you love it too.

On another note...I had some comments and emails asking where we found the accessories for the fairy garden. We found ours at the Pure Gardener in Geneva IL. I did find a great Etsy shop called the Garden Barn that sells adorable sets to get you started Here. 

One of the miniature garden kits from the Garden Barn.

 
I have noticed that a lot more garden centers are selling miniatures so you could always check around town too.

Have a fabulous day!

Sharing with Kate @Centsational Girl for her garden party.


Monday, June 13, 2011

The Fairy Gardens

Finally...the fairy garden pictures are here! It was so fun checking out everyone's plants and containers as they came by. (If you missed our fairy garden party go here.)

Here they are all lined up ready for a picture. Click any photo to enlarge it.


One friend rolled up the driveway with a radio flyer wagon that she picked up from Craigslist that morning. Fabulous idea! And great timing!


The hard part was drilling drain holes through the bottom of that thing. We didn't even think about it until it was filled with dirt. Good thing my friend Heather was determined to get the job done in her cute shoes and pink gloves.


 The little girls were so proud of their gardens. Watering them might have been the best part.


 I like the picture below because it shows all of our fun mess going on in the background.


This adorable garden was made in a drink bucket from Target.


 We used the same planter as last year.


Here is my little one making sure the stone path is just right.


Peeking in at the fairies...


Later we added a couple adirondack chairs...


and a tiny chandelier for evening fairy parties.


We all had a great time and decided to do it again next year. It really is more fun with a little help from your friends.


Somewhat Simple

Tuesday, June 7, 2011

Exterior paint color

I have finally decided on a color for the house. This was such a hard decision. It was making me crazy...and not only me....sorry friends and family.


The paint with the circle around it is the color we chose...Crownsville Gray by Benjamin Moore. Below and to the left is Devonshire Green by BM and to the right is Master Room by Ralph Lauren. Here is how I narrowed it down this weekend.

I thought I had to choose a color from the small paint deck the contractor gave me since the siding will come pre-painted. After finding out I wasn't limited and could use any paint color or brand, my options grew. I should have asked before I bought all those paint samples....none of the colors really appealed to me.


Devonshire Green by Benjamin Moore

We went to see a new construction house that our contractor just finished. The siding we are using has a cedar texture and we wanted to see it on a house. When we pulled up I was happy to see a color I liked. The owner gave us the name and I was off to the paint store....again. Knowing all along that it was probably to dark for our small house, but it was worth a try.


The color on top is Devonshire Green and the bottom color is Meadow Trail by Sherwin Williams....a bit too green.

Another inspiration was this adorable cottage that I've had in my favorite's folder since we started making plans for our house. I love the color and the copper above the window is my favorite. I was sure this was going to be it.

Paint color...Master Room by Ralph Lauren

 
When I got the RL sample up I was surprised that it was almost identical to Devonshire Green. The struggle for me is this color looks great on both style houses but it is so dark. I couldn't pull the trigger.

Master Room by RL is on the right next to Crownsville Gray.
Am I convinced this is the right color? No. I don't think I will be until I see it on the whole house. At least now I can focus on something other than paint!

We have a couple things to do before we hurry up and wait...I will fill you in as we go.
If you missed it, you can read about the plans here.

Wednesday, June 1, 2011

The Exterior Makeover Plan

It is an exciting time here at Sixty-Fifth Avenue. The exterior of our house if finally getting some much needed attention. Right now the house has faded vinyl siding and a facade that is lacking dimension. Until I share pictures with you just imagine a triangle house that a five year old would draw.

The plan is to have cement board siding installed and a portico built over the front door. A trellis will go over the front porch to add more dimension since it's not covered. Adding a covered porch is not in the budget.

My first hurdle is choosing a paint color for the siding. This has become my new obsession. I mean, this will be the color we will have to live with for the next fifteen years. (Cement board siding holds paint longer than wood.)


And what if I choose the wrong one? I've done it plenty of times for the interior of the house...at least that is only a fifty dollar mistake that can be fixed.

My mountain of samples.

I'm leaning towards earthy colors. Here is Renwick Olive by Sherwin Williams on the back of the house. The side of the house looks like a quilt with all the samples painted on.


I have another greenish color drying on the other side of this door as I type. I can't wait to see how it dries.

Here are my inspiration pictures...


I love everything about this portico. The Impatient Gardener


The soffits will be extended with the addition of brackets for a craftsman cottage look.

Country Living

Trellis and portico together.


Our trellis and trim will be white like this one.


I need to get the paint colors over to the contractor quick since it will take about three weeks to come in. I've already spent a week trying to decide. Wish me luck!
 

Site design by FABULOUS K CREATIVE