Tuesday, December 24, 2013

Christmas at our house 2013

Hello! I am feeling better and I'm ready for the festivities to begin.  Today we are making lasagna for our annual Christmas eve party.  And tomorrow we will stay home in our jammies and play all day, I can't wait!

During a snow storm a couple weeks ago I ran out and took a few pictures.   


To see our exterior remodel click here.
 
We were hoping the snow would stick around until Christmas but it didn't. 


I bought a couple five dollar wreaths from Home Depot and used one here on the front door.  I pulled off the wrinkled red bow that it came with,  hot glued some pinecones and added our glittered H.


I think it's a blogger prerequisite to use black and white ribbon this year.  I really love how versatile and sophisticated it is.


The playhouse window boxes are filled with evergreens and icicle ornaments.  The little boxwood wreath was leftover from last year so I popped it on the door. 

Is all this snow making you chilly?  The high is supposed to be 16 degrees here in Chicago, Brrr.


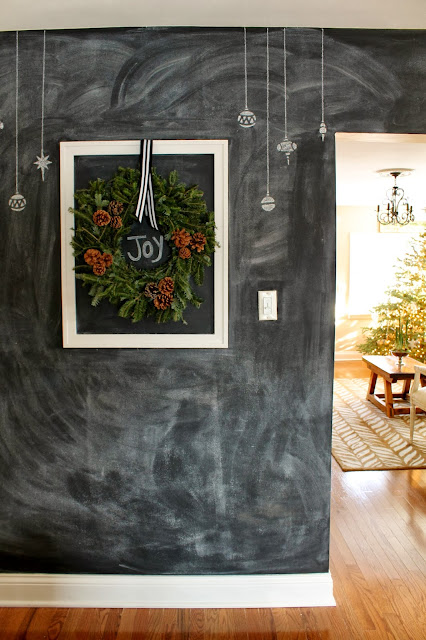
Here on the kitchen chalkboard wall I hung another one of those five dollar wreaths and glued on a few more pinecones....


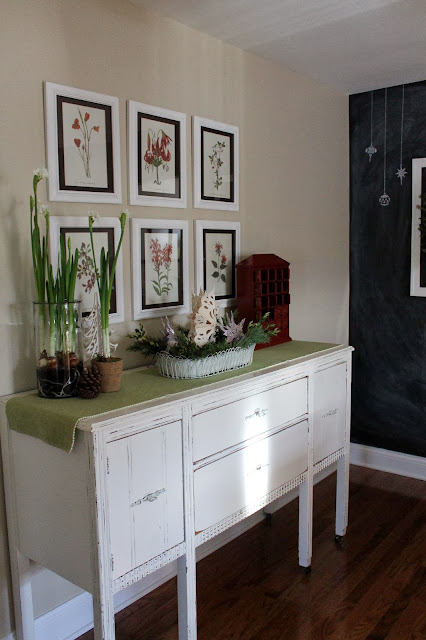
The buffet in the kitchen got some fresh greens and paper whites. 


Our tradition is to cut a fresh tree the day after Thanksgiving.

Pretty tree, just a very crooked trunk.  When looking straight on you can't tell but from the side it looks like it's falling over.

 
Mr. 65th strung about 2500 lights this year. 

 
I thought I was late to plant my paper white bulbs but they bloomed just in time. 


More fresh greens on the dining room table and on the mantle....


Everything smells so good!
 
 
The little one didn't have her room clean in time to share her tree with you.  Maybe next year;)


From our home to yours, have a very Merry Christmas!!

Wednesday, December 18, 2013

Christmas Mantel

One week until Christmas and I am sick.  So instead of doing a Christmas house tour today I thought I would pop in and share our dining room mantel. 
 

This year inspiration came from a branch I found in the backyard.  I carried it around the house wondering where I could use it until I laid it on the mantel.  It stayed so nicely without having to secure it I decided to hang ornaments from it.  


The fresh greens make the dining room smell so good, it puts me in a festive mood every time I walk by.

 
The pinecone and acorn ornaments are some of my favorites. 
 
 
I used them on our table top tree last year.
 
 
Well, I'm off to bed.  Tomorrow I am going to finish up our Christmas shopping and wrap presents.  How about you?  Are you ready for the holidays?


Friday, November 1, 2013

Serpentine Dressers

There comes a time when I really miss having a paint brush in my hand.  So lately I've been stalking craigslist and visiting estate sales to find a few projects for me to do.  When I found this serpentine dresser set with the ball and claw feet I was sold.


I love furniture with curves and keyholes. 


They were in pretty good condition except for a few chips and nicks that I fixed with wood filler. 


They came with attached mirrors but I decided to remove them and patch the holes on top.  I think that makes them more versatile and I'm sure I will find a use for the mirrors. 


I followed my typical steps to make these girls over.  First I clean the drawers and get rid of dust and spider webs.  (my least favorite part)  Then I sand everything and wipe it all down.  Spackle if needed, sand and wipe down again. 
 
 
Apply a light coat of good quality primer, I usually let that dry overnight to cure.  Sand and wipe down and start your color of choice.  I used Soft Chamois by Benjamin Moore.  It's a soft white that doesn't look too new for antique pieces.  Oh, I lightly sand between coats of paint too.


The original hardware was ok, in hindsight I should have painted a few and tried it out.  Buying sixteen new knobs is expensive, especially when I bought these to makeover and sell.  I think the glass hardware fits well with the feminine lines of these pieces but these knobs from Anthropologie would have been perfection.  At fourteen dollars a piece I sadly passed. 

Since it's getting too cold to paint outside, I am going to give Annie Sloan's chalk paint a try.  I'll be back to let you know what I think of it. 


Sharing this makeover with Miss Mustard Seed
FFF


Thursday, October 31, 2013

Happy Halloween!

Hello.  It's been a while hasn't it?  Today I'm just going to jump right back in and share our fall porch with you. 


I took these pictures the other day when it was nice out, today it's raining and supposed to continue all day.  I'm hopeful the little ones will be able to go trick or treating later. 


This year we have a dramatic black cat.  She was going to be a fox but changed her mind last minute.


I have been on the lookout for someone cutting down their tree so I could take a few of the stumps. They can be used in so many ways.


I used one here to elevate my favorite owl pumpkin front and center.  Mr. 65th spray painted it and carved it with a template.  A bit of the paint came off when we pulled the taped template off but otherwise it's been holding up great.

Off to clean the house and get ready to party indoors incase the weather doesn't cooperate.

Have a fun and safe Halloween!!


Monday, June 17, 2013

Cake Do over

I think baking a cake is like any DIY project, it can turn out great or it can be a disaster.  At least that has been my experience so far. 


The few experiences I've had baking have been working out ok until this past April when Mr. 65th got this cake for his birthday....

 
It just kind of exploded:)  We had a good laugh because of it and enjoyed it anyway, at least it tasted really good.
 
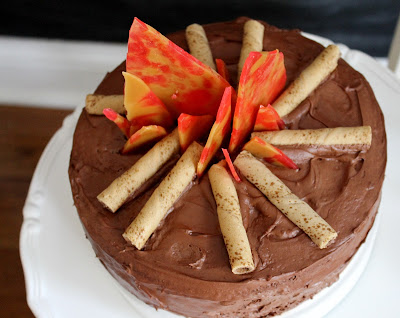
I felt bad about the ugly cake and decided to try again for Fathers Day.  When I saw a camp fire cake on Pinterest I knew it would be perfect for my outdoorsy man.  The question was could I pull it off?
 
 
Well, my confidence has been restored and I was proud to present this cake to the best Dad in the world.
 
I might have taken about 20 pictures of my creation since it turned out so well.  The candy flames are just melted butterscotch and cinnamon hard candies, pirouette cookies make the logs.
 

The how to can be found Here if you want to give it a try. 


Saturday, May 25, 2013

My Terrarium

I love terrariums and have been admiring them online for ages.  The other day I realized I had the perfect apothecary jar that I had filled with pinecones this winter.  Now that I had a container, I was inspired to give it a try.  I found a few tutorials on how to make one and headed out to my favorite nursery to buy my supplies. 


It's as simple as adding layers to your container.  The first layer is rock, mine were collected from our beach trips to Lake Michigan.  (We seem to have an endless supply in the garage)


Then a layer of charcoal to keep mold away.  I bought a small bag at the nursery where I got the moss and fairy silhouette.


Next I added a layer of preserved moss to keep the soil from settling into the rocks. 


See how easy this is?  Fun too!  The last layer is your potting soil, plants and any accessories you might want to add.  


With fairy gardens being so popular now tiny accessories are easy to find.


Someone was selling the tiny glass mushrooms at a fairy festival we went to recently.  We still believe in fairies.  See our fairy gardens here.


I took my terrarium outside to take a few pictures.  I read they need to be kept out of direct sunlight to stay healthy.  Also, learn from my mistake and don't water too much.  I have about a half inch of water sitting in the bottom of my container that I can't get out.  Turns out a plant mister is the way to go.  Distilled water will prevent the glass from becoming cloudy.
 
The possibilities are endless and they are so easy to make.  Have you made one?  I want to hear all about it. 


Monday, April 29, 2013

Ice Skating Birthday Party

Our little one turned seven not too long ago.  We celebrated with a party at the ice rink where she is taking lessons.


Of course I had to put a pretty dessert table together for her special day. 


I made the cupcakes (super moist box mix) and chocolate ice skate suckers. The skates took quite a bit longer than I had planned.  When I bought the mold I thought it would be a fast project but I decided to add a second color.


I stuck the suckers into a piece of round foam, it reminded me of a skating rink.  Mr. 65th didn't agree with me:)  Oh well, it did work well to hold them up.

One of my favorite parts of planning this party was finding the perfect invitation


Serendipity Soiree offers one of a kind designer event and holiday invitations.  Catherine was wonderful to work with and I was very pleased with the quality.


The funny part is the little one's outfit almost matched her invites.  We didn't plan it that way but it was cute!

We loved the invite so much I had to go back to her shop and buy the cupcake liners.


I had a personalized bracelet made for each of the girls from a great Etsy shop called Stargazing Lily


They were reasonably priced and came out to be just under five dollars for each girl.  So much nicer than filling a party favor bag full of candy and little junk.


We rented out the small studio rink so we had it all to ourselves.


The little one and her friends had fun showing off their skating skills and had a blast!


I hope our daughter will remember her 7th Birthday when she is older and always knows how very much we love her.


Site design by FABULOUS K CREATIVE